In this section we will explain the workflow on how to create a new docx-as-code doc.
The workflow is outlined below:
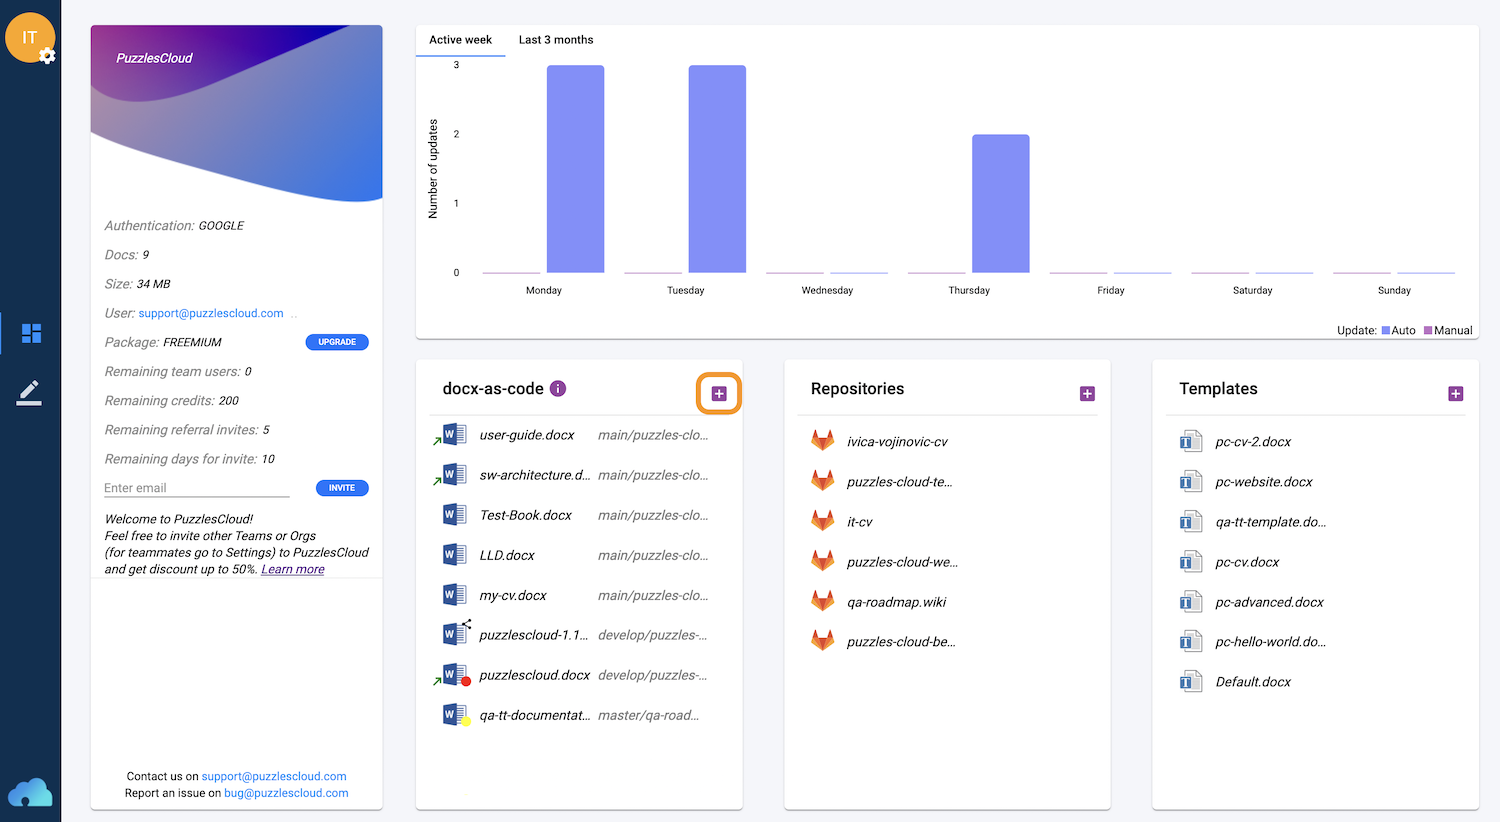
On the dashboard, click on the docx-as-code “+” button circled by orange line.
The following window will appear:
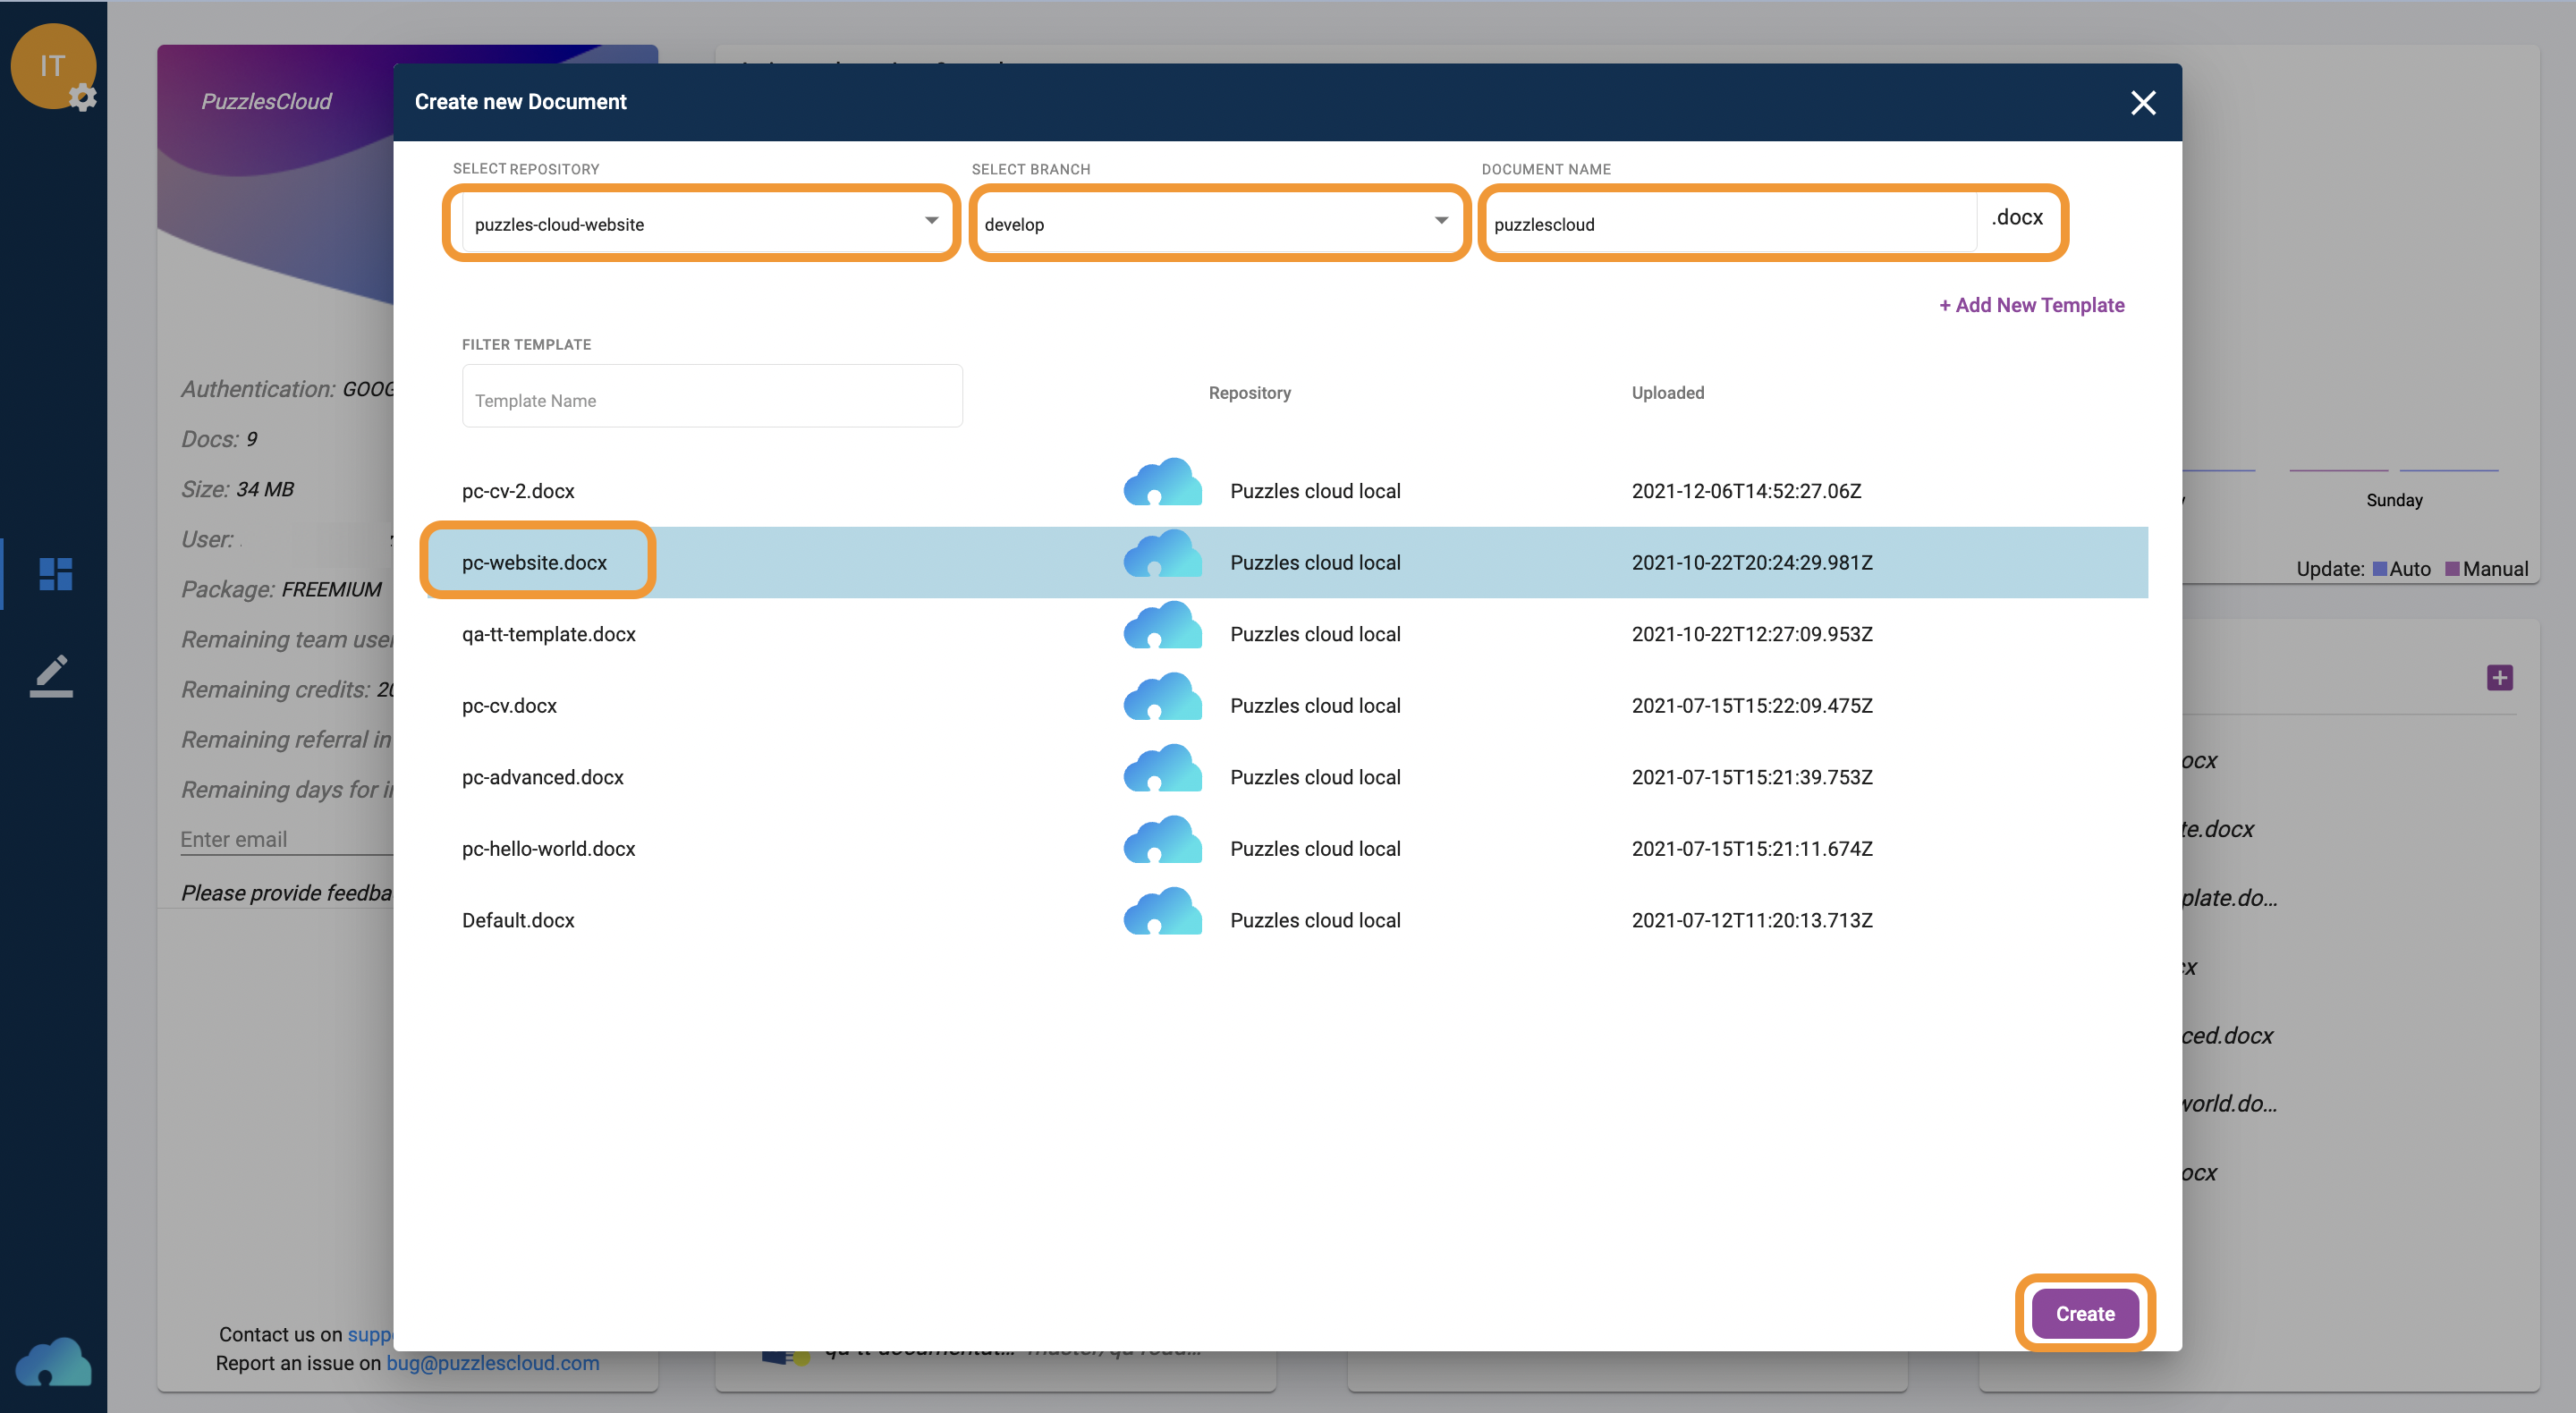
These are the mandatory fields:
- Select Repository (this is the Git repository to which new Doc will be pushed if opted),
- Select Branch (this is the Git branch to which new Doc will be pushed),
- Document Name (this is the name of the new doc),
- Template (this is the template to which you wish to put your content to).
After completing those you can click on the “Create” button.
The following window will appear:
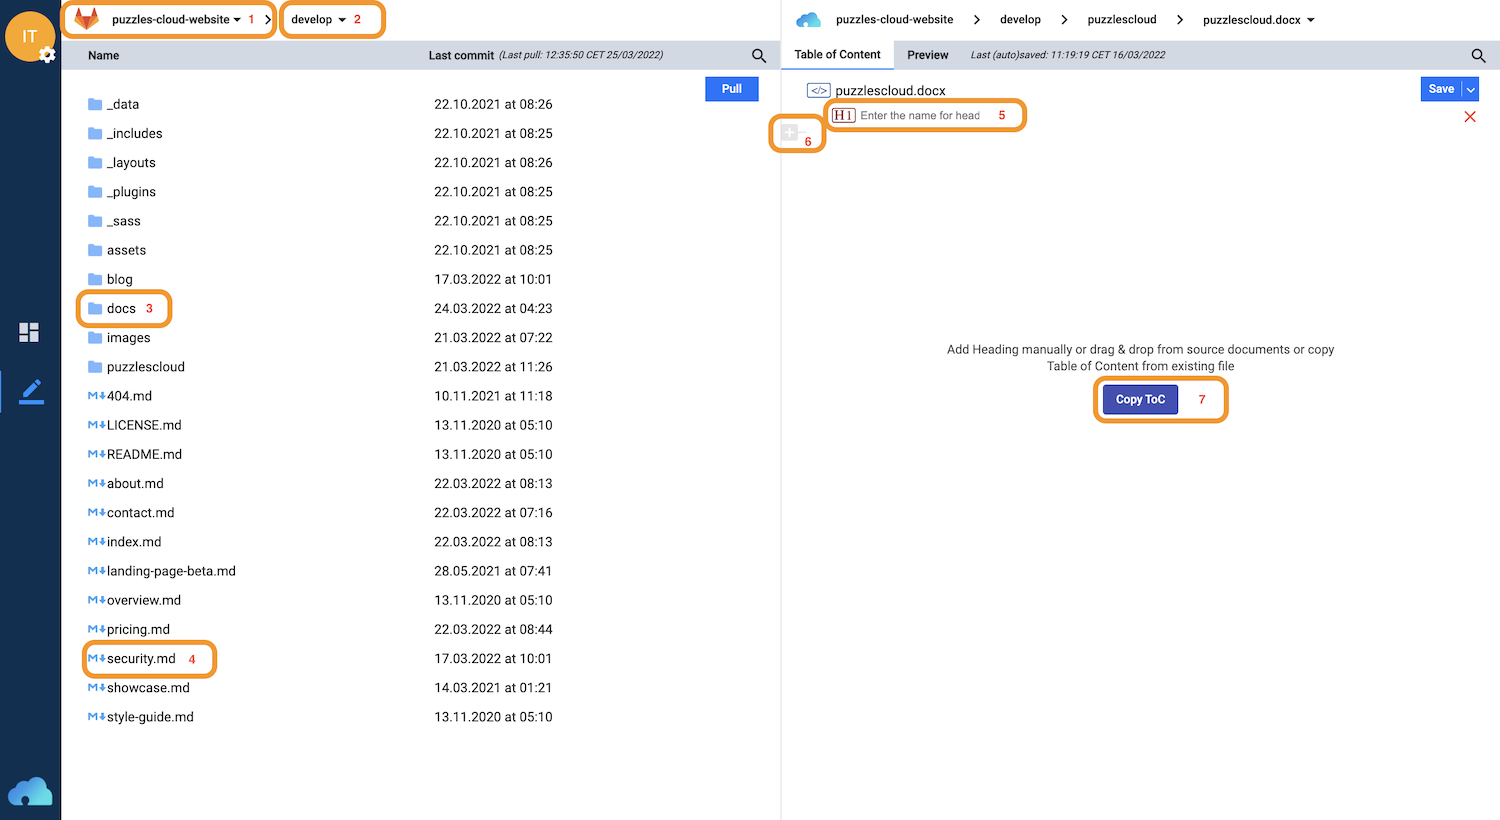
You can select on the left hand side:
- Source Docs Git Repository (You can create a single Doc of multiple Git Repos) (1)
- Source Docs branch (2)
In order to pupulate Table of Content (ToC) part the following options are available:
- Drag&Drop Folder from source section (3)
- Drag&Drop a single file from source section (4)
- Enter manually Heading name (5)
- Add manually additinal Heading (6)
- “Copy Toc” by which ToC can be copied over from an existing docx-as-code (7)
The created document is shown below.
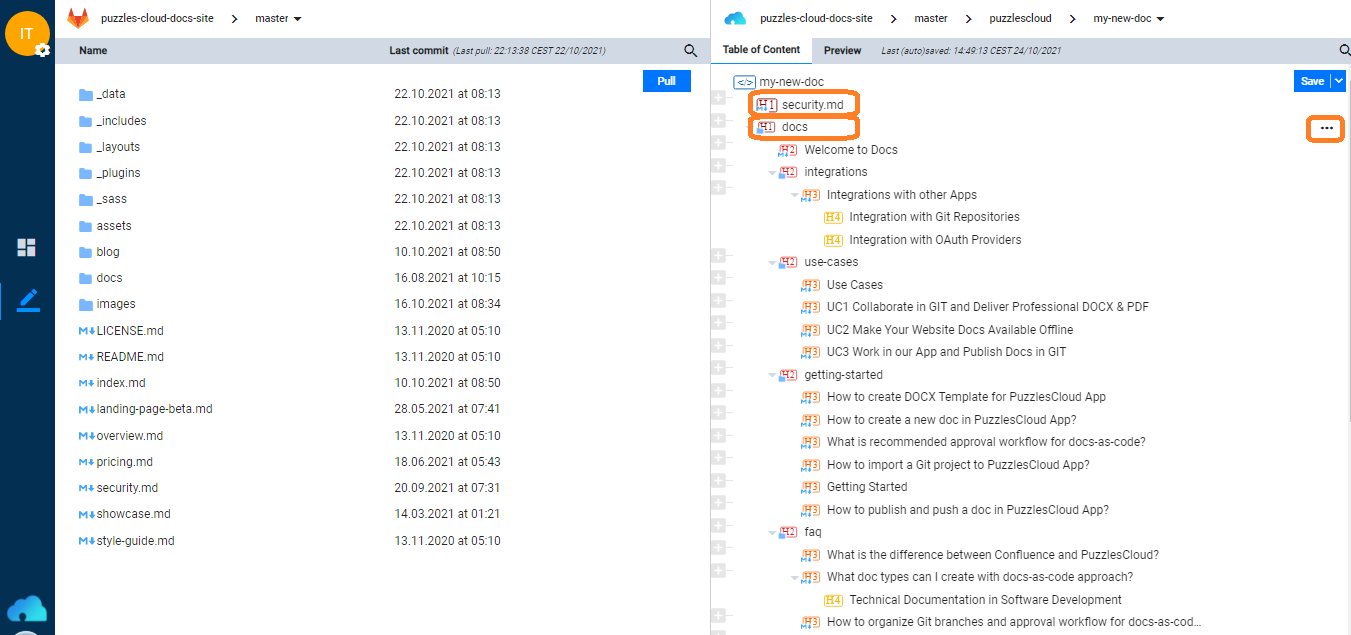
Table of Content section can be re-ordered by Drag&Drop functionality.
Clicking on “…” for a given element in the ToC section shows additional options such as:
- View
- Edit
- Delete
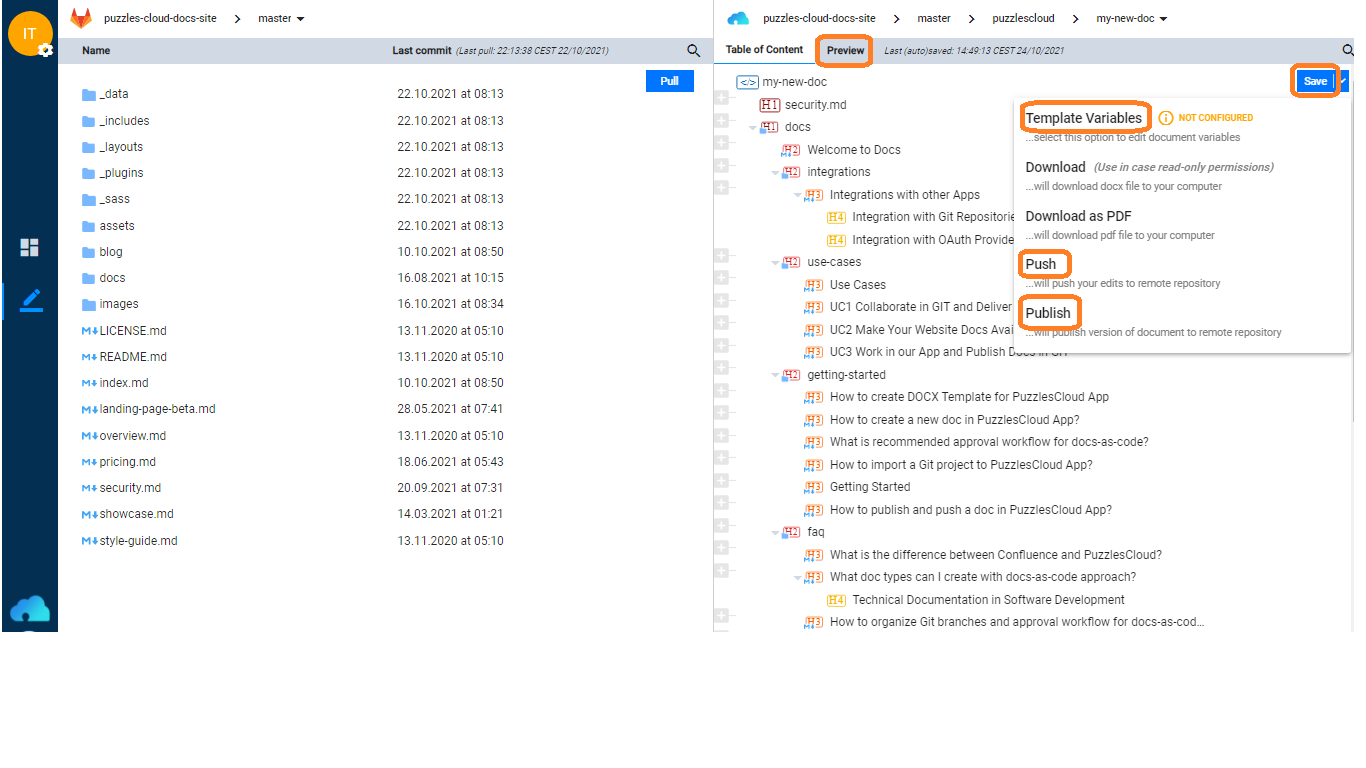
The following options are available for the created docx-as-code:
- Preview (it will show how DOCX/PDF will actually look like)
- Save (you can explicitely save the content altough autosave option is turned on by default)
- Template Variables (you can fill out Vars defined in the used DOCX Template)
- Download (DOCX)
- Download as PDF (PDF)
- Push (will push latest Doc edits to remote Git repository)
- Publish (will Publish versioned and released DOCX/PDF Doc on our Website and/or Google Drive)

